DIY Retro Gaming Station: Using a Raspberry Pi and a Laptop for the Ultimate Emulator Setup

Want to relive your favorite retro games without shelling out for expensive mini consoles or hard-to-find originals? A Raspberry Pi and a laptop might be all you need to build a flexible emulator setup that punches above its weight.
The beauty of this combo lies in its portability, cost efficiency, and customization potential. Whether you’re bringing new life to a hand-me-down laptop or turning a few spare parts into a console-killer, it’s easier than ever to jump into DIY emulation. And with access to a wide range of Raspberry Pi parts, this project is just as rewarding for beginners as it is for seasoned tinkerers.
Choosing Your Build: Raspberry Pi or Laptop (or Both)
If you’re new to emulation, the first big question is where to start. Should you go all-in on a Raspberry Pi setup or leverage the laptop you already own? The answer depends on your performance needs, platform goals, and comfort with setup.
The Raspberry Pi 4 still holds up for most classic systems, but the Pi 5 unlocks better performance across the board, especially when paired with cooling and the right OS. Laptops, though, offer raw power and emulator compatibility that Pi boards can’t yet match. That’s especially important if you’re aiming to emulate 3D-heavy consoles like PS2 or GameCube.
And if you’re already browsing options, check out current laptop computers and notebooks for potential repurposing or dedicated gaming builds.
Here’s how the two stack up depending on what you need:
- Best for Portability: Raspberry Pi builds are compact and easy to stash behind a TV or mount in a custom case.
- Best for Higher-End Consoles: A laptop with a modern processor and GPU handles demanding emulators with ease.
- Best for Beginners: Pi + Batocera setups are highly approachable and less likely to accidentally break a primary OS.
- Best for Expandability: Laptops support more emulator platforms and can double as streaming or productivity machines.
- Best for Budget Builds: Raspberry Pi boards remain among the most cost-effective hardware choices for emulation.
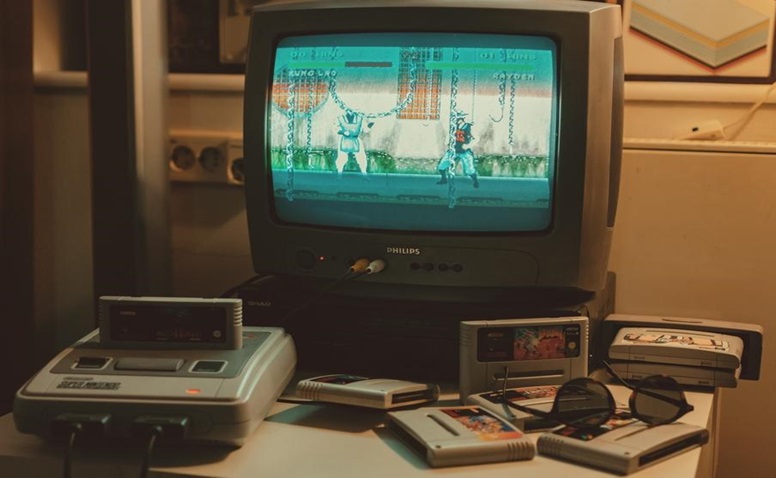
Emulator OS Showdown: RetroPie vs Batocera vs Lakka
Once you’ve picked your hardware, the next step is choosing an operating system. Emulator OSes are prebuilt environments that bundle software like RetroArch and EmulationStation with user-friendly front ends and controller support.
The top three—RetroPie, Batocera, and Lakka—each have strengths and quirks. Your pick depends on how much you want to tinker versus how fast you want to start playing.
- RetroPie: High community support, but setup on Pi 5 still requires manual install and tweaks.
- Batocera: Most beginner-friendly. Plug in and go with modern UI, great controller support, and regular updates.
- Lakka: Lightweight, ultra-configurable, and ideal for advanced users already familiar with RetroArch.
Use this breakdown to find your fit:
- RetroPie for Customization: Offers the most flexible build experience and extensive community forums.
- Batocera for Ease: Prebuilt images make it the fastest to get running—especially for Raspberry Pi 5.
- Lakka for Power Users: Great if you want a clean interface and don’t mind learning RetroArch menus.
- Best Controller Support: Batocera and RetroPie both auto-detect most USB and Bluetooth gamepads.
- Most Lightweight: Lakka runs well even on older laptops or lower-powered boards.
Source: Life morning/Shutterstock.com
Setup Guide: From Flash Drive to First Game
Getting started is easier than it sounds. If you’re using Batocera, setup is plug-and-play. For RetroPie on Pi 5, expect a few extra steps. Either way, you’ll be loading up ROMs in no time.
Start by flashing your chosen OS to a microSD card (for Pi) or USB stick (for laptops). From there, you can configure controls, enable Wi-Fi, and start adding games.
Here’s what to prepare before you boot:
- MicroSD or USB Drive: 64GB or more recommended for storing games and system files.
- Controllers: Wired or Bluetooth, pre-paired if possible.
- Keyboard (Optional): Helpful for first-time configuration and network setup.
- ROM Files: Legally backed-up copies of games you own, organized by console.
Common first-time snags include controller misreads, missing BIOS files, or incorrect folder structures. Thankfully, most of these can be fixed with a quick reboot or a trip to the system settings.
Making It Work Together: Laptop + Pi Integration
You can’t just plug your Pi’s HDMI into a laptop and expect it to work—that port is for output, not input. But there are creative ways to use your laptop as a display or helper device.
For remote access, VNC and Remote Desktop are the easiest. This allows you to control your Pi from your laptop over Wi-Fi. It’s great for casual use, game scraping, and setup adjustments.
Alternatively, use a USB capture card to send HDMI signal into your laptop. It’s not perfect for twitchy games due to minor lag, but works well for most 2D systems.
Or skip the Pi entirely. You can run Batocera straight from a USB on your laptop. No installs, no risk. Just boot from the drive and enjoy full access to the same emulators and front ends.
Popular laptop integration options include:
- VNC or RDP: Control your Pi wirelessly through your laptop.
- HDMI Capture Card: View Pi video through a USB device and software like OBS.
- USB Boot of Batocera: Turn your laptop into a retro console without touching the internal OS.
- Dual Boot Setup: For advanced users who want full flexibility across OSes.
- Web-Based File Sharing: Manage ROMs over the network with drag-and-drop access.
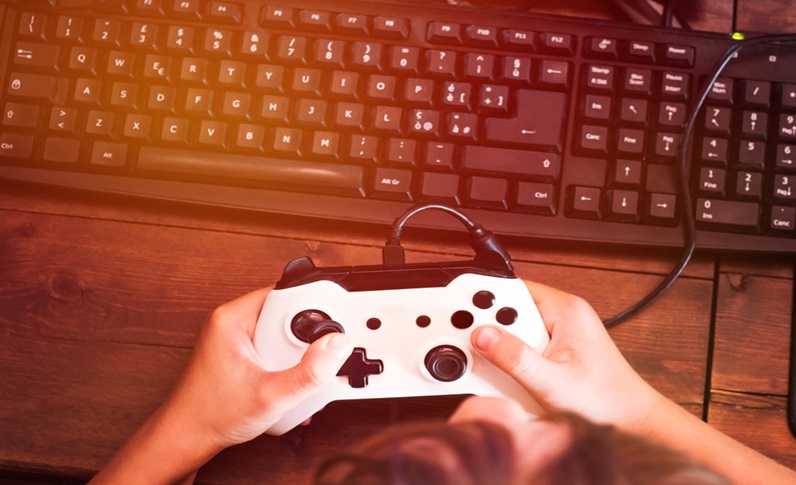
Controllers That Click: Inputs That Just Work
Not all controllers are created equal, especially when it comes to latency, button mapping, and compatibility with emulator front ends.
For most users, wired USB gamepads are the easiest choice. They’re plug-and-play and often auto-configure in Batocera and RetroPie. Bluetooth controllers work too, but may need extra setup and can introduce slight lag.
When in doubt, choose a widely supported brand like 8BitDo, Sony DualShock, or Xbox controllers.
Look for the following when picking your controller:
- Broad Compatibility: PS4/PS5, Xbox Series, 8BitDo, and Logitech models all work well.
- Low Input Lag: Wired USB always wins for precision. Bluetooth is fine for casual play.
- Easy Mapping: Emulator OSes make remapping buttons straightforward in settings menus.
- Hotkey Support: Useful for quick save/load, fast-forward, or quitting a game.
- Comfortable Grip: If you’re gaming for hours, pick a layout that feels good in your hands.
Tuning and Troubleshooting: Get That Perfect Experience
Once you’re up and running, a few simple tweaks can help make gameplay smoother and more stable—especially if you’re pushing the limits of your hardware.
Thermal throttling is a common issue with Raspberry Pi 5. A cooling fan is essential, especially when running N64, Dreamcast, or PS2 games. You’ll also want to watch for underpowered chargers and flaky SD cards.
Here’s what to tune and monitor:
- Enable Cooling: Add a heatsink and fan to prevent throttling.
- Check Your Power Supply: Underpowered adapters can cause crashes or lag.
- Optimize Emulator Settings: Switch video output, enable threaded rendering, or lower resolution.
- Update Firmware: Some bugs disappear after a system update.
- Test Alternate Cores: If one emulator doesn’t perform well, try a different engine.
Source: M-Production/Shutterstock.com
Keeping It Fresh: ROMs, Storage, and Upgrades
Once your station is running, managing and expanding your game library becomes the next fun project. You can start with a few favorites, then build out organized, themed collections by platform or region.
ROMs should always come from your own backups. Emulators are legal, but downloading commercial games you don’t own is not.
Storage is simple. Many users keep libraries on external USB SSDs or flash drives. Others link to a NAS or network share so every device accesses the same archive.
And if you enjoy customizing your setup, it’s worth exploring other DIY angles. From custom arcade sticks to Pi cases styled like retro consoles, there’s no shortage of ways to make your setup your own. If you’re already experimenting, you might also enjoy exploring 3D printer supplies for enclosures and mods.
A few key ideas to explore:
- External SSDs: Fast, portable, and perfect for big multi-platform collections.
- 3D-Printed Cases: Protect your Pi while adding retro flair.
- USB Hubs: For multiple controllers, drives, and adapters.
- ROM Scrapers: Automatically organize and add box art to your collection.
- Safe Backups: Always keep a second copy of your builds and saves.
Leveling Up: Where to Go Next
If this setup has you hooked, there’s more you can do. Upgrading from a Pi 4 to a Pi 5 offers a solid boost for newer systems. Switching from a Pi to a mini PC or repurposed gaming laptop opens up even more emulator options—from Wii and PS2 to 3DS and early PS3.
Some users dive into FPGA-based options like MiSTer for near-perfect hardware emulation of legacy consoles. Others build arcade cabinets or wall-mounted stations for the full retro experience.
Whether you’re just starting or thinking about your next evolution, this hobby thrives on experimentation. You’re not just gaming—you’re building, customizing, and learning as you go.


